OpenClaw for Content Production: A Beginner’s Guide
Build a repeatable, evidence-first workflow that ends with a checked draft—not an automatic publish button.
An AI agent becomes useful for publishing work when it produces evidence you can inspect—not when it merely produces fluent prose. In this tutorial, you will set up OpenClaw as a supervised content-production assistant. It will help turn a topic into a source list, research packet, outline, English article draft, and claim-by-claim fact check. Then it stops.
The result is reviewable files, not a live page. A human editor still decides whether to revise, approve, or publish.
This workflow suits small editorial teams, researchers, and content marketers who can check sources. It is the wrong tool for unsupervised publishing, confidential work without an approved data plan, or professional legal, medical, or financial judgment. For a quick brainstorm, chat is simpler.
01What an AI agent is—and where OpenClaw fits
In plain language, an AI agent is a language model connected to ways of doing work. The model interprets your request. Tools let it read a file, search or fetch the web, write a document, run an approved command, or hand work to another session. Rules and permissions limit what it may do.
A basic chat assistant normally gives you conversational text. A tool-enabled agent can work with a persistent project folder and leave structured artifacts for the next step.
That extra reach is useful and risky. File or network access means a mistaken instruction or malicious source can cause more than a bad paragraph. OpenClaw provides the Gateway, sessions, tool policies, files, and provider connections; it does not make the model infallible.
Recommendation: Think of OpenClaw as a junior production assistant working inside a fenced editorial desk. Give it enough access to prepare evidence and drafts, but not the authority to publish, pay, delete, or alter accounts.
02Before you begin: accounts, time, and cost
You need a supported computer and a current OpenClaw installation path. The official installation page lists macOS, Linux, and Windows options and the current Node.js requirement. Do not rely on a version number copied from an older tutorial; check the live page before installing.[1]
You also need usable model access. OpenClaw’s onboarding can use a supported provider API key or, for some routes, an existing supported CLI login. Available providers and sign-in methods change, so choose from the current provider directory and read that provider’s terms.[2]
A provider account may require billing. Cost depends on the provider, model, input, output, retries, and search service. Prices and limits change, so use the provider’s current pricing and usage dashboard.[8][10]
Planning recommendation: Reserve about an hour for setup and an afternoon for the first sourced article. This is guidance, not an OpenClaw performance claim.
Keep these ready:
- a new, non-production project folder; - your publication’s editorial policy and source rules; - model-provider access configured through onboarding or approved secret storage; - several known-good primary-source URLs for the first test; - time to open every important source and review every consequential claim.
Review privacy, retention, copyright, and data-residency requirements before sending material to a provider. A local Gateway does not necessarily mean local model processing.
03Install safely and start locally
Setup details vary by operating system and release. Use the current official Getting started guide ↗ and installation page ↗, not a copied command from an unknown blog.
For a low-commitment trial, the current getting-started guide documents:
```bash npx openclaw@latest ```
Follow the guided onboarding, select a provider route you control, and keep the Gateway local. The official security guide says a regular host installation binds the Gateway to loopback by default. That makes it reachable from the same machine rather than exposing it broadly on the network.[3]
After installation, use the documented checks appropriate to your route:
```bash openclaw gateway status openclaw dashboard openclaw doctor ```
Expected output: Gateway status reports a running service or process; the dashboard opens; `doctor` does not report an unresolved configuration failure.
Simple check: Send a harmless chat request such as “Reply with the current workspace path only.” Do not connect a publishing channel yet.
If setup fails, `openclaw triage` is the official symptom-gathering route. It runs read-only checks and prepares a sanitised diagnosis; you decide whether to hand it to an agent.[4]
04Create an editorial workspace
Make a dedicated folder with this structure using your normal file manager or terminal:
```text content-workspace/ AGENTS.md EDITORIAL_POLICY.md inbox/ research/ drafts/ approved/ ```
`AGENTS.md` should describe the workflow and stop before publication. `EDITORIAL_POLICY.md` should define audience, sources, citations, tone, prohibited claims, and review.
Place no API keys, passwords, session tokens, private customer records, or production credentials in this folder. Configure secrets through OpenClaw’s supported credential flow or a secret manager, never in a prompt or repository.[8][9]
Expected output: An empty project with clear rules and no connection to production.
Simple check: Ask OpenClaw to list the filenames it can see and state, without changing anything, whether it can access paths outside the workspace. If access is broader than intended, stop and tighten file/tool policy before continuing.
05The seven-stage supervised project
Use a fresh session for the project. Each prompt below includes six useful ingredients: role, goal, context, sources, constraints, and output format. Replace bracketed text. Treat these as templates.
### 1. Turn an idea into a topic brief
Start narrow enough to verify.
```text Role: You are a cautious commissioning editor. Goal: Turn [TOPIC] into one practical article brief for non-technical US and European readers. Context: The article must help readers make or understand one concrete decision. Sources: Do not research yet. Use only the topic and context in this prompt. Constraints: Separate known facts from assumptions. Flag timeliness, risks, and missing evidence. Do not draft the article. Output format: Save inbox/[SLUG].md with a proposed headline, reader outcome, why now, scope, exclusions, key questions, risks, and a 100-point relevance score. Stop after saving. ```
Expected output: One brief, not an article.
Check: Can you state the reader’s outcome in one sentence? Reject the topic if it is vague, promotional, or lacks obtainable primary evidence.
### 2. Build an approved-source plan
Give the agent source boundaries before web research.
```text Role: You are an evidence researcher. Goal: Create a source plan for the approved topic brief at inbox/[SLUG].md. Context: Primary sources come first; independent confirmation is required for major news when available. Sources: Use official documentation, company announcements, filings, government or regulator pages, standards bodies, research papers, and direct transcripts. Use Reuters or AP for independent confirmation when available. Community posts are discovery leads only. Constraints: Never cite a search-results page. Do not invent URLs, dates, quotations, or access. Mark sources you could not open. Output format: Add an approved-source table to the brief with publisher, direct URL, publication date, access date, intended claim, source type, and status: opened / not opened. Stop for human source approval. ```
Expected output: A source plan with direct URLs and a visible “opened” status.
Check: Open every proposed source yourself. Remove aggregators masquerading as originals. Approve the list in writing before the next stage.
### 3. Prepare the research packet
Now permit evidence collection, but not article writing.
```text Role: You are a research analyst who quotes sparingly and paraphrases independently. Goal: Build a verifiable research packet for [SLUG]. Context: The approved brief and source table are in inbox/[SLUG].md. Sources: Use only human-approved sources. You may suggest additional sources in a separate section, but do not use them as evidence until approved. Constraints: Record conflicts and uncertainty. Each factual claim must link to evidence. Do not infer a date, number, role, price, capability, or quotation. Output format: Save research/[SLUG].md with summary, chronology, definitions, evidence notes, contrary evidence, unanswered questions, and a claim ledger: claim | source URL | publication date | evidence type | confidence | notes. Stop after saving. ```
Expected output: A research file that lets another editor retrace each important statement.
Check: Randomly choose five claims and confirm the linked page says what the ledger says. A URL that merely discusses the same topic is not support.
### 4. Create an outline from verified claims
The outline is the bridge between evidence and prose.
```text Role: You are an explanatory editor. Goal: Design an outline that leads with the reader consequence. Context: Use research/[SLUG].md. Audience: non-technical readers in the US and Europe. Sources: Use only ledger claims marked high or medium confidence; identify any low-confidence point separately. Constraints: Separate reported fact, analysis, and prediction. Include limitations and a counterargument. No clickbait. Output format: Append an Outline section to research/[SLUG].md with headline, dek, thesis, section headings, claim IDs under each section, and a conclusion stating the reader’s next step. Stop for outline approval. ```
Expected output: Headings mapped to claim IDs.
Check: Delete any section that has no evidence or reader purpose. Approve the outline before drafting.
### 5. Draft the article without publishing
```text Role: You are an English-language technology journalist writing clearly for beginners. Goal: Draft the approved outline as an original [WORD RANGE]-word article. Context: Follow AGENTS.md, EDITORIAL_POLICY.md, and the approved outline in research/[SLUG].md. Sources: Use only approved claim-ledger evidence. Link descriptive text to direct sources and add a numbered Sources section. Constraints: Short paragraphs; no invented quotations, claims, prices, commands, or capabilities. Label analysis and recommendations. Keep status: draft. Do not access production, publish, email, or post. Output format: Save drafts/[SLUG].md with YAML metadata, descriptive headings, body, limitations, reader checklist, image brief, and numbered Sources. Stop after saving. ```
Expected output: A complete draft file whose front matter still says `status: draft`.
Check: Confirm the headline matches the evidence, the word count is in range, and every link is direct. Search for absolute words such as “always,” “never,” and “guaranteed”; each needs exceptional support.
### 6. Run a claim-by-claim fact check
Do not ask, “Is this accurate?” That invites a vague answer. Demand an inventory.
```text Role: You are an adversarial fact-checker independent of the drafter. Goal: Verify every externally checkable claim in drafts/[SLUG].md against the research packet and original sources. Context: The draft is not approved. Accuracy outranks smooth prose. Sources: Open the direct source for each claim; the draft itself and AI summaries are not evidence. Constraints: Check names, roles, dates, numbers, prices, versions, commands, product capabilities, quotations, and causal claims. Mark missing or conflicting evidence. Do not silently rewrite the draft. Output format: Save drafts/[SLUG].fact-check.md with one row per claim: ID | draft text/location | source | status (verified / disputed / outdated / unsupported) | correction | reviewer note. End with a high-impact-issues list and readiness verdict. ```
Expected output: A separate audit trail, including failures.
Check: No unsupported high-impact claim may remain. Open a sample of “verified” links yourself; agents can hallucinate citations or misread real pages.
### 7. Stop for human approval
The final prompt makes the boundary explicit.
```text Role: You are a production assistant with no publishing authority. Goal: Prepare a human review summary for [SLUG]. Context: Use the draft and fact-check files only. Sources: Cite file paths and unresolved claim IDs. Constraints: Do not publish, upload, send, schedule, delete, pay, or change any account. Do not move the draft to approved/. Ask for explicit human decisions on unresolved items. Output format: Report word count, files created, verified/disputed/unsupported totals, required corrections, and a final line: “Awaiting human editorial approval.” ```
A human editor now reads the article, checks sensitive claims, makes corrections, and explicitly approves any later publication step through the organisation’s normal system. Approval to draft is not approval to publish.
06Security boundaries worth keeping
OpenClaw’s security guidance treats one Gateway as one trust boundary. Do not use one shared Gateway for mutually untrusted users. Anyone who can trigger a tool-enabled agent may share some of its delegated reach, so restrict inbound access and tools.[3]
Keep a beginner setup on the local loopback interface. Add remote access only after reading the current exposure guidance and enabling appropriate authentication. Run `openclaw security audit` after meaningful configuration changes.[3]
Apply least privilege: workspace-only file access, only the network tools needed for approved sources, and no production CMS credentials. Sandboxing can reduce the blast radius of file and process actions, but current documentation says it is off by default and not a perfect boundary.[5]
Never put secrets in prompts, source files, terminal command arguments, or repositories. Use supported credential storage, limit provider permissions, monitor usage, and rotate compromised keys.[8][9]
Human-confirmation rule: Require a person to confirm posting, payments, deletion, and account or security changes. This is an editorial recommendation; do not assume every installation enforces it automatically.
07Troubleshooting: symptom, likely cause, solution
| Symptom | Likely cause | Solution | |---|---|---| | `openclaw: command not found` | The CLI was not installed, or its global binary folder is missing from `PATH`. | Follow the official Node troubleshooting page. Check `node -v`, `npm prefix -g`, and your `PATH`; reopen the terminal after correcting setup.[1][6] | | Node is missing or rejected | Node is absent or outside the currently supported range. | Use the current official installer or Node setup page. Do not guess a version from an old tutorial.[1][6] | | Plugin or runtime reports a version mismatch | The Gateway host, plugin, generated files, or external runtime came from incompatible releases. | Record the exact versions, consult the plugin and update docs, install a supported/pinned plugin release, restart through the documented method, and re-run `openclaw doctor`. Do not force-load incompatible code.[7] | | Sign-in returns to the login screen | Stale provider credentials, wrong auth layer, blocked browser state, or proxy/Gateway configuration. | Identify whether the failure is provider, Gateway, or proxy authentication. Re-run the documented onboarding/configuration path, clear only the affected session, and use `openclaw triage`. Do not disable authentication to “fix” the loop.[4] | | File read/write returns permission denied | The workspace path, operating-system permissions, sandbox access, or workspace-only policy blocks it. | Move the project into an allowed folder or deliberately adjust the narrowest relevant permission. Keep production and secret directories outside scope.[5] | | Web research cannot connect | Search credentials are missing, sandbox/network egress is disabled, DNS/proxy policy blocks access, or the site rejects requests. | Check the configured web tool and its official provider page. Approve only required hosts; otherwise supply approved URLs manually and mark unavailable sources. | | Requests fail with a rate-limit error | The provider’s request, token, acceleration, or spend limit was reached. | Pause, follow the provider’s retry guidance, reduce parallel/repeated work, and inspect the provider usage/limits page. Do not hammer retry.[10] | | A citation opens to the wrong page or does not support the sentence | The model invented, truncated, or misapplied the citation. | Mark the claim unsupported, locate the original primary source, record the exact supported claim, and rerun the fact check. Never “repair” a URL by guessing. |
08Common beginner mistakes and limitations
The largest mistake is asking for “a well-researched article” in one prompt. That hides source selection, reasoning, and corrections inside one fluent response. Stages create inspection points.
Another mistake is granting every tool because it feels convenient. More access does not make the model wiser. It increases the consequences of a bad instruction or prompt injection.
Do not treat a polished sentence, a plausible URL, or repeated agreement as verification. Models can fabricate citations, merge facts from different dates, and preserve an error across revisions. They also have incomplete context windows and may omit evidence from long source sets.
Finally, do not automate a weak process. If editors disagree about approved sources, claims, or audience, encode those decisions before adding an agent.
09How Signal & Syntax uses the pattern
Example: Signal & Syntax organises work into `inbox/`, `research/`, and `drafts/`. A topic brief records relevance and source quality. A selected topic receives a claim ledger, then a draft and a separate fact-check file. The assistant must keep `status: draft` and cannot move work to approval without the owner’s explicit decision.
That is supervised production, not fully autonomous publishing. The practical benefit is traceability: an editor can see which source supports which claim and where uncertainty remains.
10Final checklist
- [ ] The project is separate from production. - [ ] Current official installation and provider pages were checked. - [ ] Gateway access is local or deliberately secured. - [ ] Secrets are outside prompts and repositories. - [ ] File, network, command, and plugin permissions follow least privilege. - [ ] A human approved the topic and direct source list. - [ ] The research packet includes contrary evidence and unanswered questions. - [ ] Outline sections map to claim-ledger evidence. - [ ] Draft front matter says `status: draft`. - [ ] Every consequential claim has been checked against an opened source. - [ ] Unsupported high-impact claims were removed or corrected. - [ ] A human—not the agent—will decide whether to publish, pay, delete, or change an account.
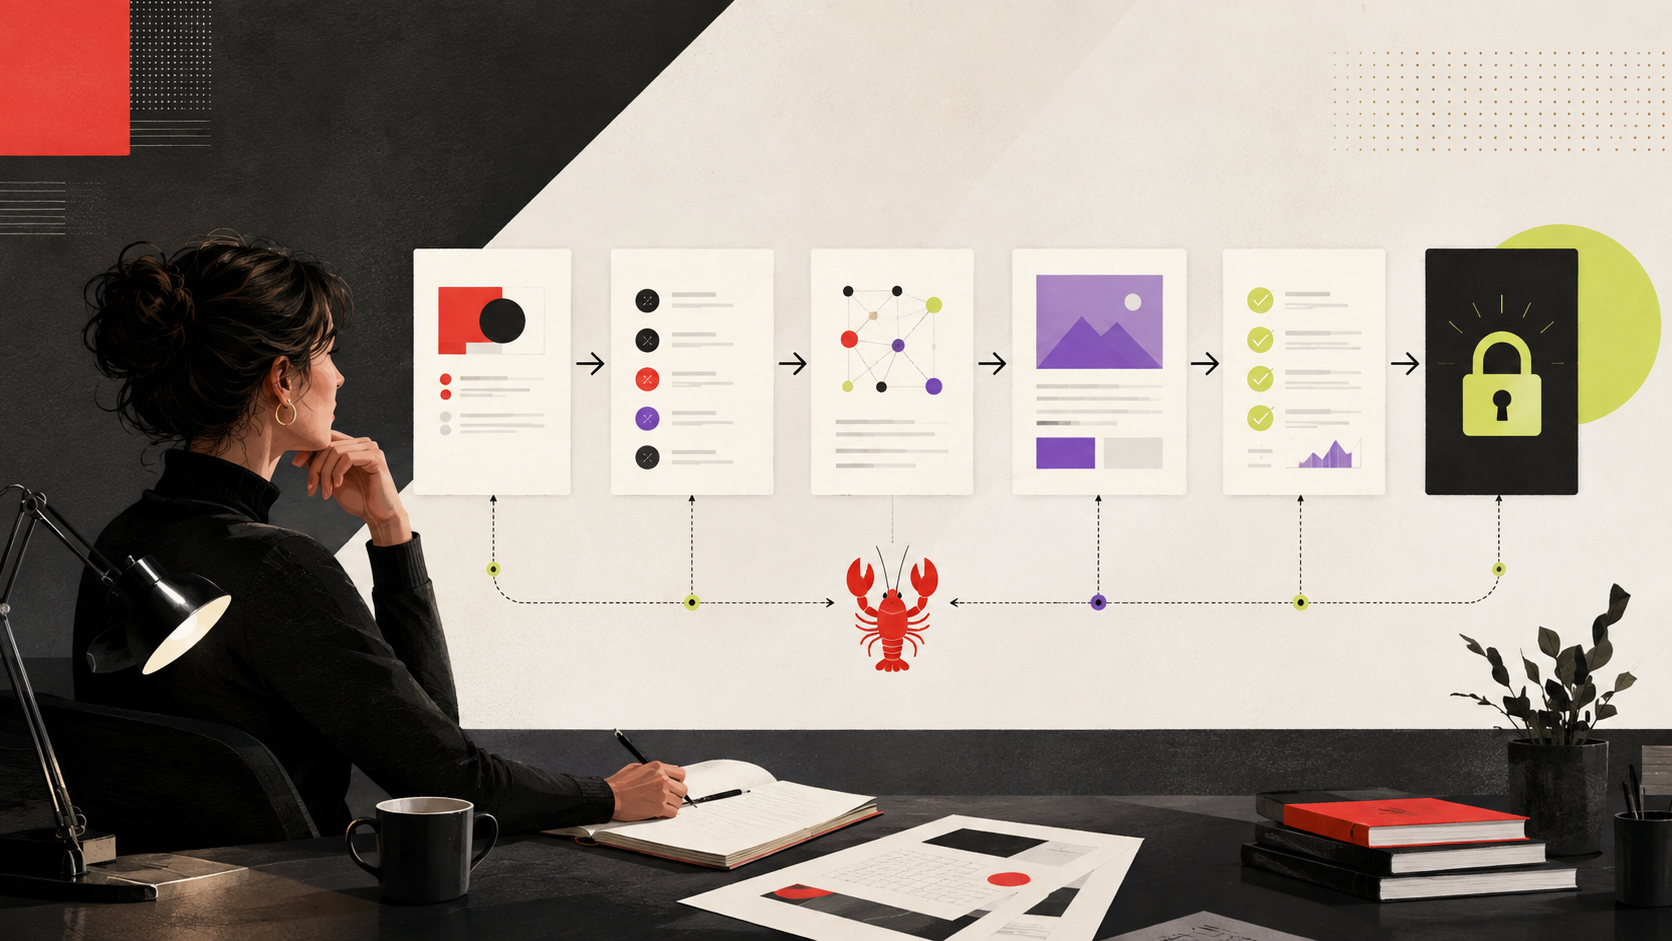
11Editorial hero-image brief
Create a 16:9 editorial illustration of a calm human editor reviewing a visible sequence of topic brief, approved source cards, research notes, article draft, fact-check ticks, and a final locked approval gate. Connect the stages with clean lines to a small local AI-agent symbol. Use a restrained blue, cream, and charcoal palette. Avoid robot clichés, company logos, tiny text, and any suggestion that publishing is autonomous.
12Sources
1. OpenClaw installation guide ↗ — accessed 7 September 2026. 2. OpenClaw provider directory ↗ — accessed 7 September 2026. 3. OpenClaw Gateway security guide ↗ — accessed 7 September 2026. 4. OpenClaw getting-started guide ↗ — accessed 7 September 2026. 5. OpenClaw sandboxing guide ↗ — accessed 7 September 2026. 6. OpenClaw Node.js setup and troubleshooting ↗ — accessed 7 September 2026. 7. OpenClaw plugin documentation ↗ — accessed 7 September 2026. 8. OpenAI production best practices ↗ — accessed 7 September 2026. 9. OpenAI API-key safety guidance ↗ — accessed 7 September 2026. 10. Anthropic API rate limits ↗ — accessed 7 September 2026. 11. OpenClaw GitHub repository ↗ — accessed 7 September 2026.